
You know that kind of public wlan hotspots at hotels, coffee shops or other businesses that offer wifi access but you need to accept their terms of service?
The technique of offering a consensus Web page right when you initially connect to an open wifi is called a ‘captive portal’.
A captive portal forces an http client to first visit a dedicated web page asking the user to either login, share their email or to simply consent to the hotspots terms of service.
This technique intercepts any request no matter to which Web address your http client intends to navigate to and redirects the client to show the captive page instead.
The technique of using a captive portal can also be used on a low cost ESP32 or ESP8266 wifi controller board to show a welcome Web page or to show some sort of automatically delivered message.
The remainder of this blog post shows how to set up and run a captive portal on your ESP controller board and how to redirect to a welcome Web page.
Set up a software access point
As a first step, we will implement and run a software access point on the esp controller board. For that purpose you download the Arduino development studio and you create a new project as it is shown below.
The setup routine is called once when your controller board powers up and the loop is continuously executed as a main routine of your controller:
void setup() {
  // put your setup code here, to run once:

}

void loop() {
  // put your main code here, to run repeatedly:

}
Now let’s put some code inside those routines to mimic a software access point on our controller board. As we want to offer an open wifi network, we don’t use any wifi password in the setup call.
#include <ESP8266WiFi.h>
#include <WiFiClient.h>
#include <ESP8266WebServer.h>
#include <DNSServer.h>
#include <ESP8266mDNS.h>

#ifndef SSID
#define SSID "open"
#endif

const char *softAP_ssid = SSID;

// The access points IP address and net mask
// It uses the default Google DNS IP address 8.8.8.8 to capture all
// Android dns requests
IPAddress apIP(8, 8, 8, 8);
IPAddress netMsk(255, 255, 255, 0);

void setup() {
  delay(1000);
  Serial.begin(9600);
  Serial.println();
  Serial.println("Configuring access point...");
  WiFi.softAPConfig(apIP, apIP, netMsk);
  // its an open WLAN access point without a password parameter
  WiFi.softAP(softAP_ssid);
  delay(1000);
  Serial.print("AP IP address: ");
  Serial.println(WiFi.softAPIP());

}

void loop() {
  // put your main code here, to run repeatedly:

}
Now we configure a DNS server to redirect all network requests towards our own controller’s address:
// DNS server
const byte DNS_PORT = 53;
DNSServer dnsServer;
Within our setup routine we add the initialization of the local DNS server, as it is shown below:
dnsServer.setErrorReplyCode(DNSReplyCode::NoError);
dnsServer.start(DNS_PORT, "*", apIP);
Once the dns server is started within the setup routine, we have to add the handler call within the loop routine to handle all the incoming dns requests, as it is shown below:
void loop() {
  // handle all the DNS requests
  dnsServer.processNextRequest();
}
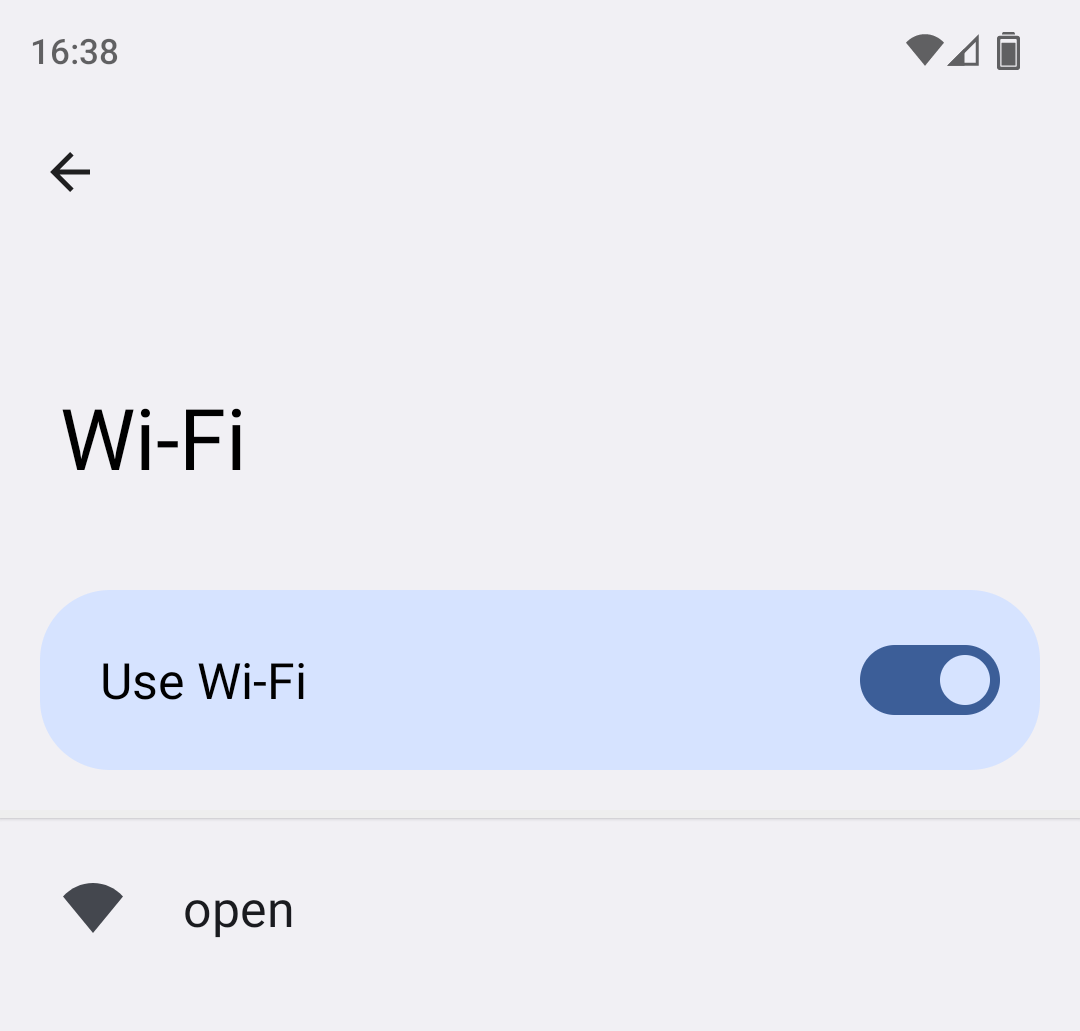
After this first exercise, you can already compile and flash your code to your controller board and once its running you will find a new wifi network named ‘open’, as it is shown below:
Set up a local Webserver
After successfully running a wifi access point on your controller and configuring a local DNS to redirect every request to your local IP address, we further need to offer a local Web server that shows a default welcome page at HTTP port 80.
First we declare the Web server as a global variable, as it is shown below:
// Web server ESP8266WebServer server(80);Now we go back to our setup routine and add the initialization code for our web server, as it is shown below:
// Setup the web server
server.on("/", handleRoot);
server.on("/generate_204", handleRoot);
server.onNotFound(handleNotFound);
server.begin(); // Web server start
Serial.println("HTTP server started");
The handleRoot routine, simply returns a hello world web page, as it is shown below:
void handleRoot() {
  if (captivePortal()) {
    return;
  }
  server.sendHeader("Cache-Control", "no-cache, no-store, must-revalidate");
  server.sendHeader("Pragma", "no-cache");
  server.sendHeader("Expires", "-1");

  String p;
  p += F(
            "<html><head></head><body>"
            "<h1>HELLO WORLD!!</h1>");
  p += F("</body></html>");

  server.send(200, "text/html", p);
}
The captivePortal routine checks if the incoming request is targeted to our local controllers web server IP. In case it’s not, the address is redirected to the local controller IP.
boolean captivePortal() {
  if (!isIp(server.hostHeader())) {
    Serial.println("Request redirected to captive portal");
    server.sendHeader("Location", String("http://") + toStringIp(server.client().localIP()), true);
    server.send(302, "text/plain", "");
    server.client().stop();
    return true;
  }
  return false;
}
Once the controller board is up and running, it offers a local web server on port 80 that serves a minimalistic hello world web page.
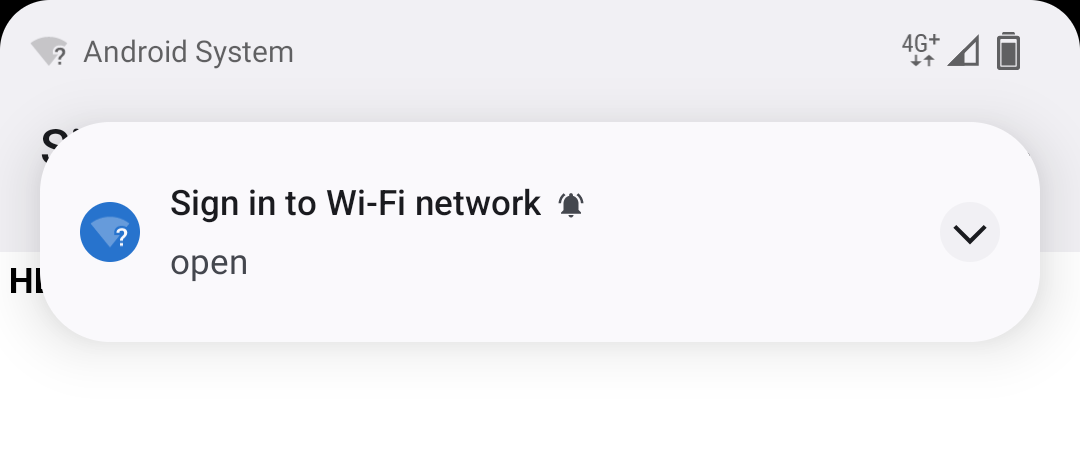
In case a new Wifi client wants to connect to our ‘open’ wifi, the credentials dialog automatically redirects the client to our captive portal, as it is shown below:

Summary
This blog post showed how to use a simple and cheap esp32 or esp8266 controller board to act as a software access point and to capture all Web requests on a single hello world web page.
This technique is used by millions of open access points world wide to ask the users for credentials or for consensus on their terms of service.
The same technique can easily be used to implement all kinds of self-service IoT scenarios where the device automatically shows a local onboarding page with further explanations.
Without the information of eduperez on stackoverflow, this blog post would not have been possible. Many thanks for their inspiring work!
Find the full source code in my github repository.