When I came to play around with GitHub Actions CI/CD pipeline framework recently, I could not believe how simple and effective that functionality is!
It does not really matter, if you just want to automatically check each of your Git commits by using lint or to fully build your artefacts, GitHub actions allows you to do that with a simple YAML configuration.
GitHub actions allows the definition of different jobs that are automatically triggered on events happening within your Git repository (such as commits, pull, creation of a tag or releases, comments, creation of issues, and many more). As those job definitions are living in the same Git repository, its the perfect solution for managing your CI/CD pipeline as code within a self-contained GitHub repository.
Within this post, I will describe how I came to fully automate the CI/CD pipeline of my production Android App (TabShop) by using GitHub Actions.
Kudos to Niraj Prajapati who wrote such a great blog post and who inspired me to fully automate my own Android app’s CI/CD pipeline.
Why – Whats the value for app publishers?
I can’t emphasise the value of a fully automated CI/CD pipeline enough! I spent hours over hours on manually building and testing my Android app, to finally sign it and push it to the Google Play Store. So far, I released 182 versions over 6 years. The build, test and release process gets more and more complex and error-prone. Freelance app publishers, like me, invest a significant amount of time into manual CI/CD processes that are much better spent in building innovations into the app itself.
That said, GitHub Actions does allow me to create and run a feature rich CI/CD release process fully automatically in the cloud, which helps me to save time and effort and to innovate!
Scope of my Android CI/CD Pipeline
This blog shows step-by-step how to implement the following tasks into your own GitHub Actions CI/CD pipeline:
- Build your app using the Gradle Build Tool
- Run your unit-tests
- Build a release app bundle
- Sign the app bundle
- Upload and expose the app bundle
- Push and release the app bundle in Google Play Console
Step 1: Automate your Android app build
The first step within our Android app’s CI/CD pipeline is to create a GitHub Action YAML file and to add a trigger that defines when the job should be run.
Navigate to your GitHub project repository and click on the ‘Actions’ tab where you find a button to create a new ‘workflow’.
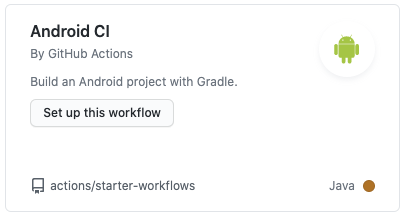
GitHub offers a lot of standard build workflows for the most popular technology stacks. In our case we either choose to skip the template selection or we choose the Android CI workflow as shown below:
The resulting workflow will create an Android build job that already fulfills our first goal, which is to startup a Ubuntu instance, checkout your apps sourcecode and to execute the Gradle build file, as it is shown below:
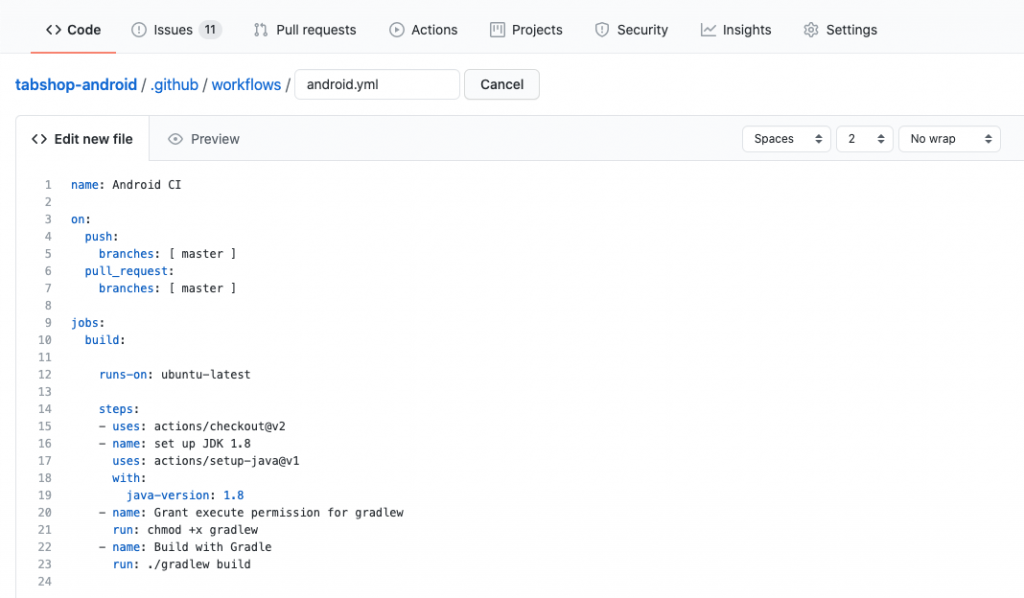
The workflow above is triggered every time a ‘push’ or a ‘pull_request’ is triggered within your repository.
Step 2: Execute your unit-tests
A good unit tests coverage is recommended to safeguard your app against failing or buggy code contributions. In most Android app projects, the unit test code is part of your Git repository, so Gradle is also used to build and execute your tests by adding following step to your workflow:

Step 3: Build a release app bundle
Within the next step we will trigger the build of a release app bundle (AAB) that we will sign in the next step. App release bundles are the preferred way of shipping apps through the Google Play Appstore, as they are optimised in size and stripped of unnecessary content.
See below the workflow step that automatically builds our application release bundle:

Step 4: Sign the app bundle
Application bundles are typically signed with the certificate of a trustworthy app publisher, so that users can trust the origin of the installed app and that no third-party injected malicious parts into your app.
App marketplaces such as Google Play require apps to be signed with the certificate of the publisher to ensure the integrity of all published apps.
Therefore we will automatically sign our app bundle once its built by adding the below workflow step:
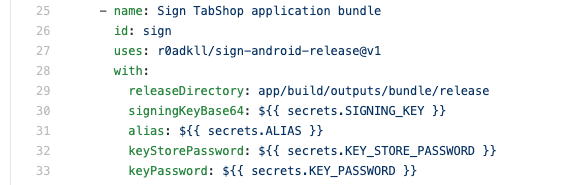
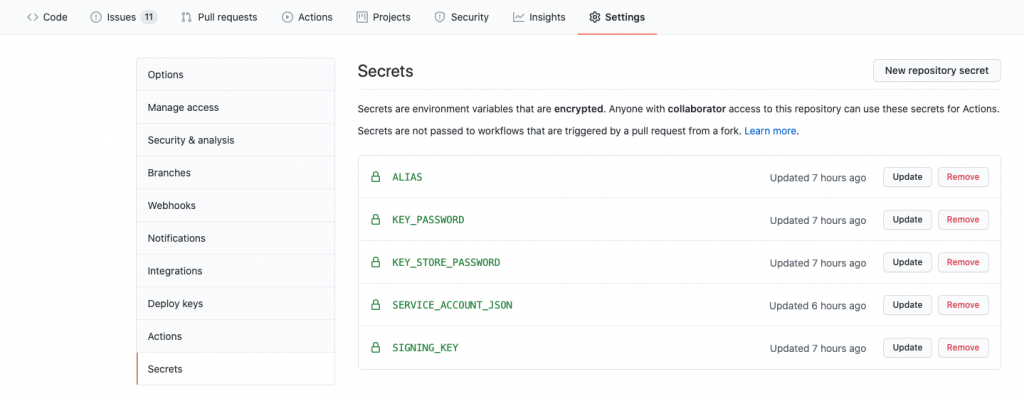
The signing step above does need some additional information about your own certificate as well as the key store password and alias, which we will provide as safe GitHub secret placeholders as shown below:
- secrets.SIGNING_KEY
- secrets.ALIAS
- secrets.KEY_STORE_PASSWORD
- secrets.KEY_PASSWORD
Convert your certificate file into a base64 encoded string that can be used as a GitHub repository secret within the placeholder ‘secrets.SIGNING_KEY’. In case you are using a Mac you are lucky as the command for converting your secret file into a base64 encoded string is already provided by openssl, as it is shown below:
openssl base64 -in my-release-key.keystore -out my-release-key.keystore.base64
See the resulting list of GitHub secrets within the screenshot below:
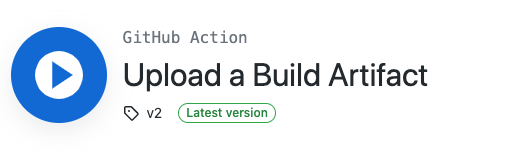
Find the signin GitHub action that we used in our workflow below:

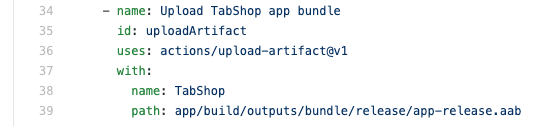
Step 5: Upload and expose the app bundle
Each workflow run does spin up a completely clean Ubuntu instance that is wiped after its finished.
If you would like to keep a build artefact for later download you have to define a build step to upload and persist the artefact, as it is shown below:
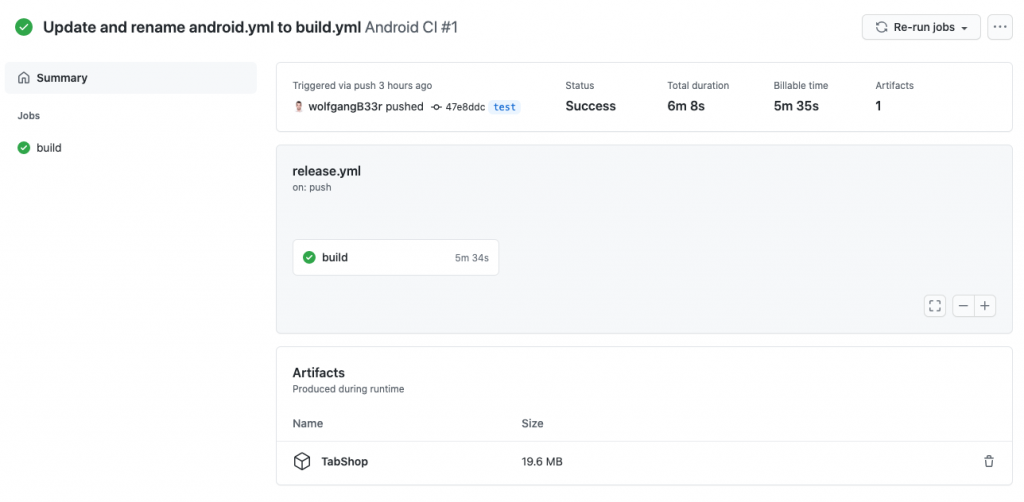
After your workflow is successfully finished you will find your file within the workflow execution screen:
Step 6: Push and release the app bundle in Google Play Console
Now that we successfully built and signed our application, we would like to automatically push the app as a new beta release into your Google Play Console.
Again there is a dedicated GitHub Action that helps to achieve this cumbersome task, see below:

Another important prerequisite for a successful Google Play upload is the creation of a ‘Service account’ that holds the necessary IAM role for uploading artefacts into your Google Play account.
To create a new service account you have to navigate to your Google Play Console > Settings > API Access as it is shown in the screenshot below:

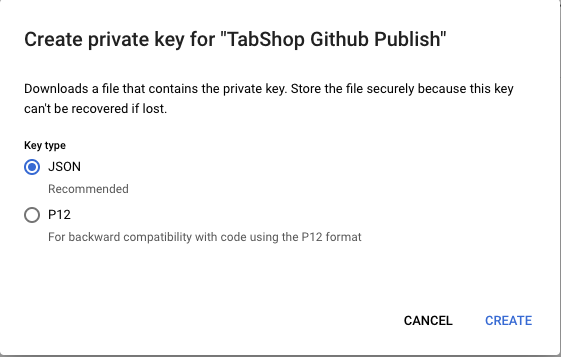
Create a new Service Account with release access right for your application. In case you are a Google Cloud user as well, you have to create the Service Account user within Google Cloud Console instead and then grant access to the selected app project.
Once you have your service account created, you have to create a JSON key for that service account and put it in a GitHub secret placeholder again. Just copy the JSON string into a GitHub secret field with the name ‘SERVICE_ACCOUNT_JSON’.
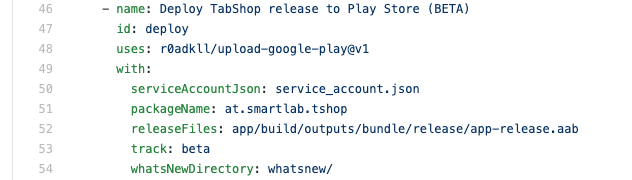
Once you have stored your service account key in a GitHub secret, you can create a workflow step to download it during the workflow run and store it in a file (service_account.json), as it is shown below:

The final step is to use the Upload Action to publish your application bundle to Google Play Console as it is shown below:
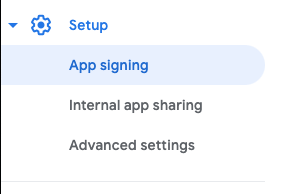
Important note here is that you will receive an error message if you did not enable the App Signing in your Google Play account. To opt-into app signing, you simply navigate to Google Play Console > Your App > Setting > App Signing, as shown below. You have to upload your signing key as private key file (which can be exported by Android Studio).
Summary
It’s amazing how easy and productive it is to use a GitHub Actions workflow to completely automate your Android app release process. It helps you to ensure consistent release quality and safes a lot of time especially for small and independent app publishers. See the running CI/CD workflow below.
Well done GitHub and Microsoft!