Today’s home automation market is largely dominated by prominent vendors who offer a wide spectrum of sensors and actuators that work well in their own homogeneous environments. As long as you stick to the vendor’s collection of hardware, everything should work smoothly and with highest usability. This is also called vendor lock in 😉
As I am used to tinkering around with my proprietary hardware, such as self-designed, Arduino and ESP32 based sensors, I wanted to build upon an Open Source Home Automation system that allows me to integrate all kinds of proprietary hardware and that is backed by a strong community of makers worldwide.
Home Assistant
After trying out several Open Source home automation systems, I came to the conclusion that Home Assistant perfectly fits my requirements.
Home Assistant, or short HASS, is written in Python and offers thousands of community provided integrations in all kinds of existing platforms, such as Alexa or Google Nest.
Home Assistant dashboards are fully configurable through YAML files as well as through UI and it’s pretty simple to use a GitHub repository to version your home automation configuration.
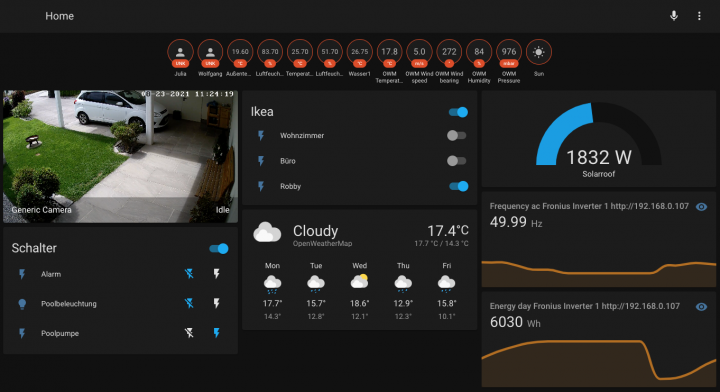
See below an example of my own Home Assistant dashboard that is configured to give me quick access to my most important Ikea power switches as well as to show the latest weather report for my region.
An integration with my Fronius solar power converter allows me to review my solar power gain in real time while checking my door cam for visitors.

You can create and switch between multiple dashboards which are completely customizable. Each dashboard can contain all kinds of information and action tiles that either show important information or allow you to control one of your devices preferably using MQTT protocol.
Run Home Assistant in a Docker container
One huge advantage that comes with Home Assistant, is its super light footprint and its ability to run in a standalone Docker container!
I first started to install Home Assistant on my Raspberry Pi but quickly switched to running it in a Docker container, as it is much more flexible when it comes to the upgrade process.
As a Home Assistant instance only depends on a local folder of configuration YAML files, it’s easier to run it in a Docker container than to hassle around with its Python library dependencies.
One other huge benefit of running HASS in a Docker container is that you can run multiple different versions of the same configuration in parallel. This helps a lot while upgrading to a new major software version. You can test the newer version already without breaking your running Home Assistant instance.
Just spin up the new instance version without any risk and test it with your existing config. In case the newer version runs well — fine, otherwise stick to the running version until you figure out why the newer version does not work as expected.

Host your Home Assistant Docker instance in a Synology Diskstation
There are many reasons why I think that Synology Diskstation NAS devices are a perfect solution, but one of the most outstanding features definitely is their capability to run any kind of Docker images directly on your Network Attached Storage (NAS).
Not only that you already have a reliable permanent disk storage available that can be mounted by containers, it also saves you the money and the power costs to run separate devices within your household (e.g.: a Raspberry PI).
The price and power costs for a single Raspberry Pi are neglectable, but it’s definitely convenient to just maintain one single device, even if you want to run multiple Dockerized server instances in parallel.
One aspect you have to consider when buying a Synology Diskstation though, is that you select one of those series that is running on an Intel CPU (DS218+, DS220+, …), as those are the ones that are able to host Docker containers natively.

Once you have such a Synology device at hand, you can follow the steps below to directly run your Open Source Home Assistant instance.
Install the Home Assistant Docker Image on your NAS
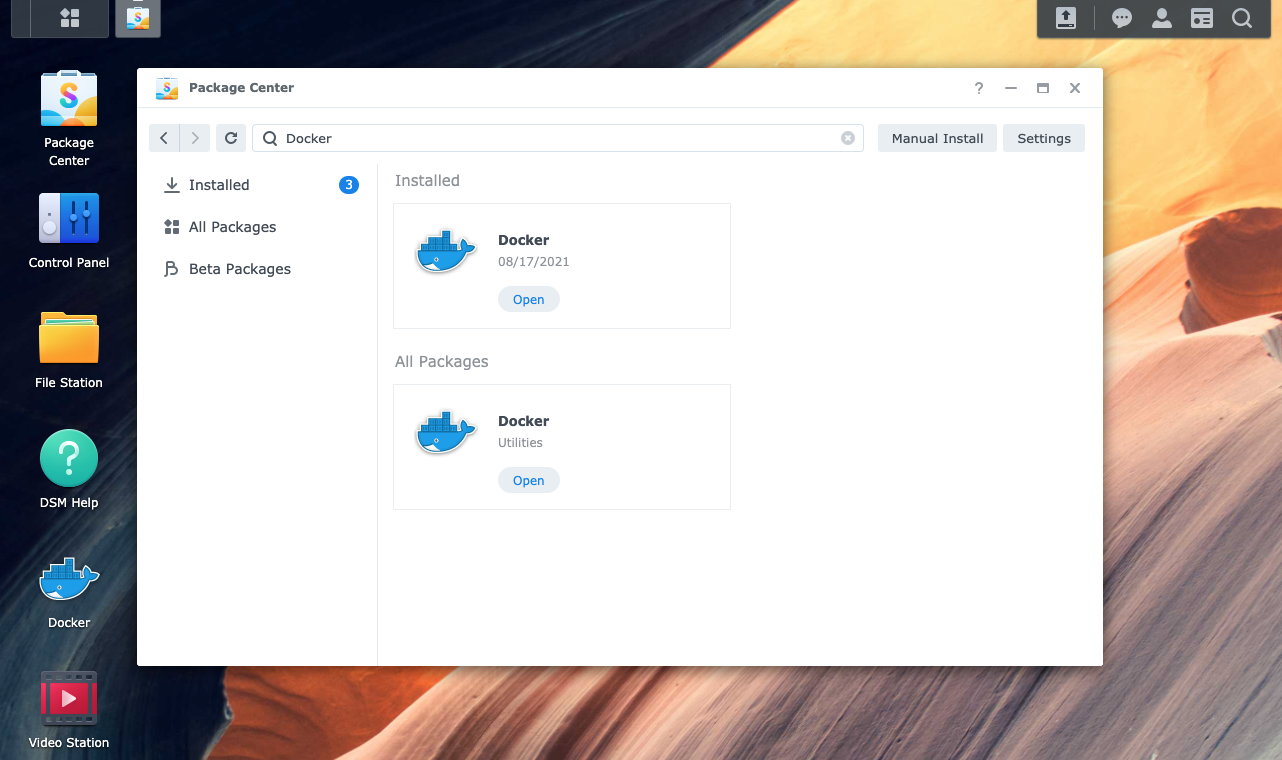
As a first step, we will log into the Synology Diskstation admin console and install the Docker package within the package center, as it is shown below:
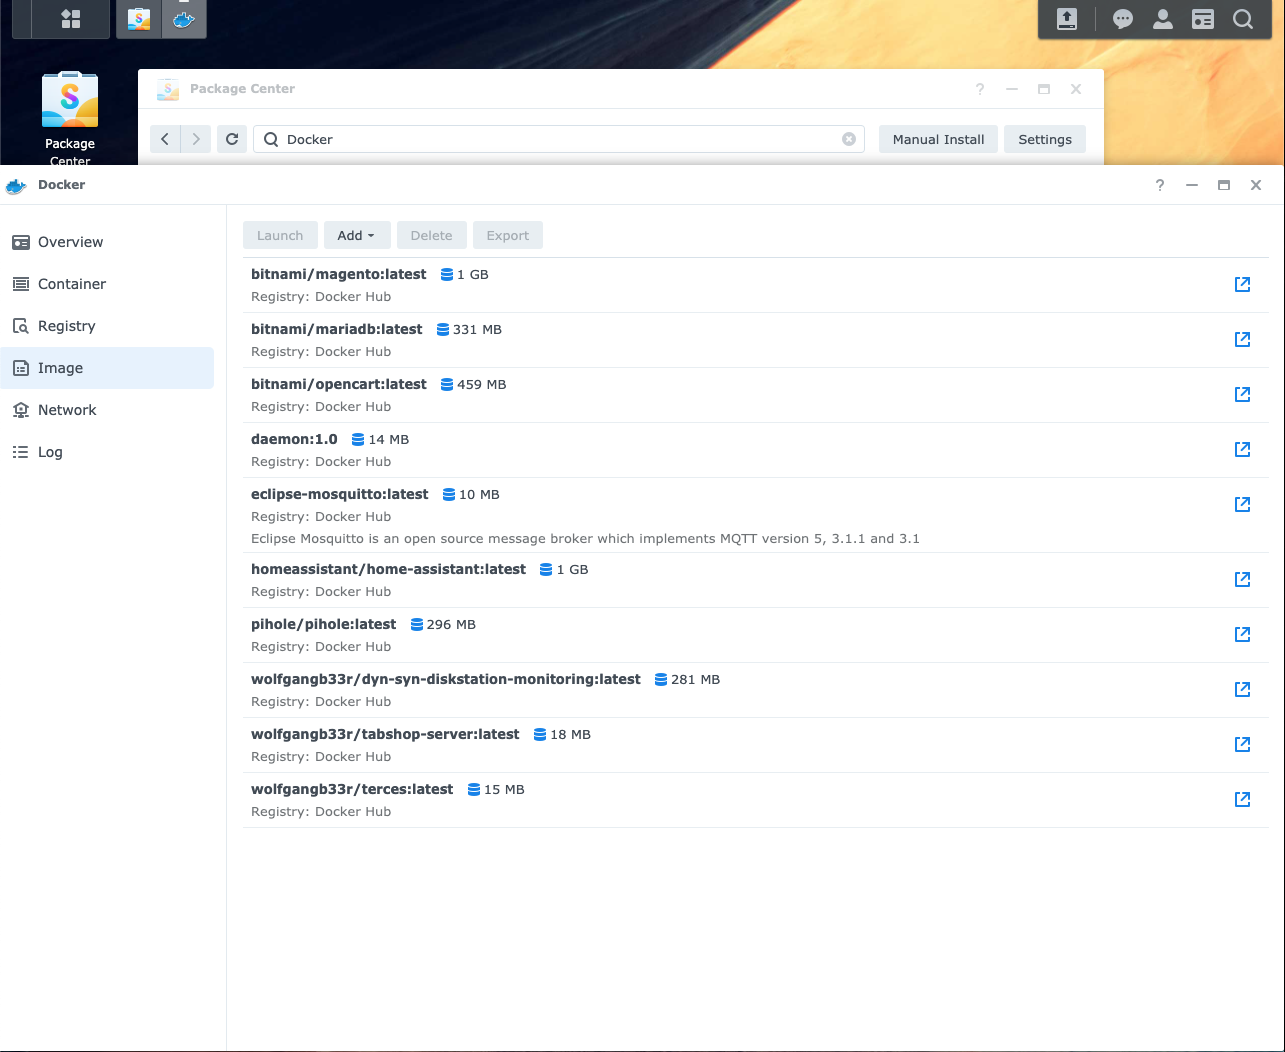
After successfully installing the Docker package within your Synology Diskstation, open the Docker package and select the ‘Image’ menu entry on the left side of the Docker screen.
The Images list shows all the Docker images that you already downloaded onto your local device and that are ready for starting them as a container instance.
See below a list of Docker images that I already downloaded to my local Diskstation:
Instead of searching the Docker registry for known images, we will directly download the Home Assistant image by using its official Docker Hub URL:
https://hub.docker.com/r/homeassistant/home-assistant
Just select ‘Add from URL’ in the top action menu and enter the Docker Hub URL into the input field.

Besides downloading the Home Assistant image, we will also download a convenient image for running a separate MQTT server, which will then be used by Home Assistant as the main message broker.
Again, select the ‘Add from URL’ action and enter the following URL to download the Eclipse-Mosquitto MQQT image:
https://hub.docker.com/r/eclipse-mosquitto
If everything went well, the Docker image list will show following two images:

Before we can start a Home Assistant instance, we need to create a local folder that will contain the system’s configuration. It will also be used by your Docker image to persist data that should survive a container restart.
Creating a folder to permanently store config and data
Luckily we are running the Docker image on a NAS, so we have plenty of permanent disk storage available.
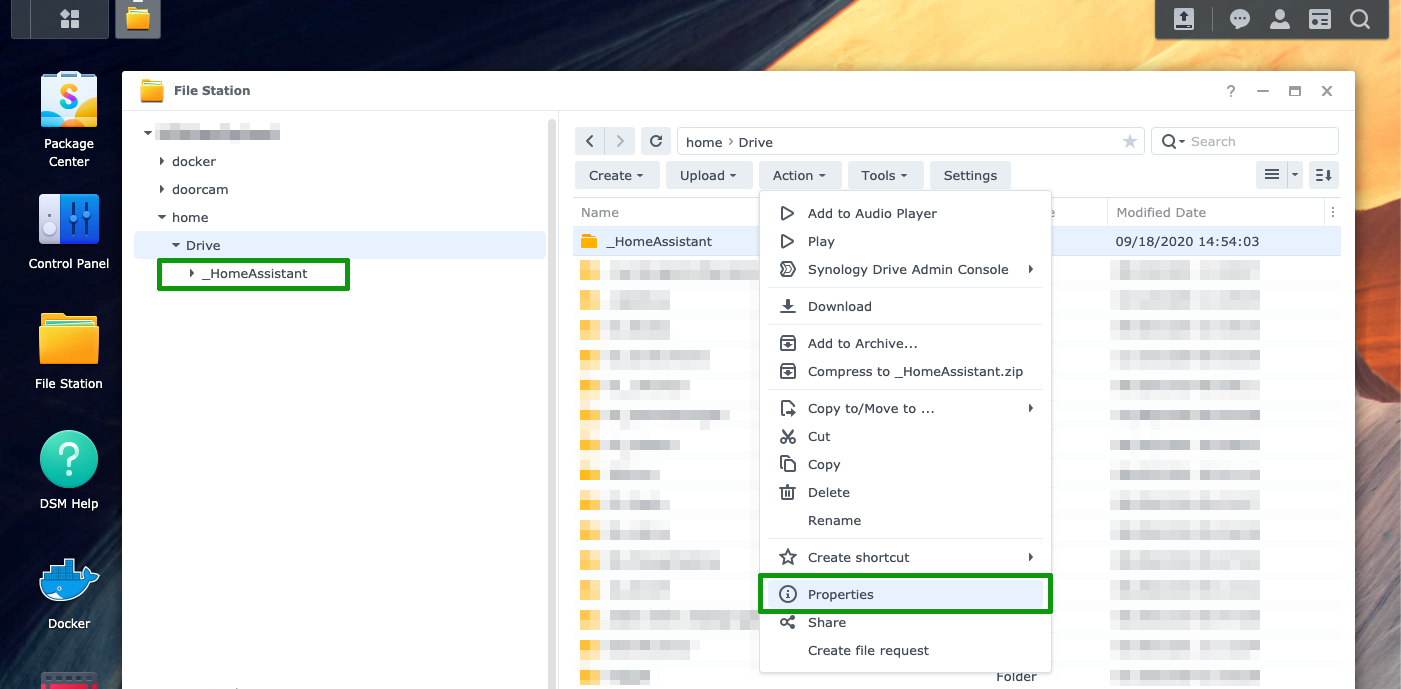
Simply create a folder within your Synology Disk. My folder is named ‘_HomeAssistant’ but you can name your folder however you want.
In order to give the Docker container access to your newly created folder, you need to open the folder’s properties, as it is shown in the screenshot below and set read and write access rights for ‘Everybody’.
Now that we have a folder ready for storing the Home Assistant data, we will start our home automation container, as it is shown in the next section.
Starting your Home Automation Container
Navigate back to your Synology Docker image view, which lists your Home Assistant image. Double click on the image name in order to open the startup parameter configuration screen, as it is shown below.
Click on the ‘Advanced’ button to show all the available parameters.

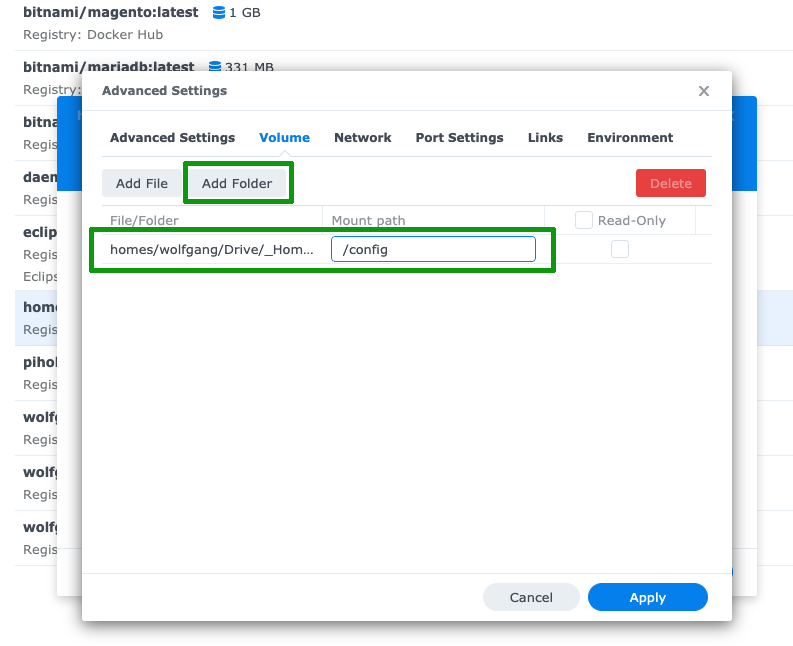
Now, click on the ‘Volume’ configuration tab to map your local NAS folder to the configuration folder /config that the container will use to read the configuration and to permanently store the home automation database.
See below the necessary mapping of your local folder to the containers ‘/config’ folder:
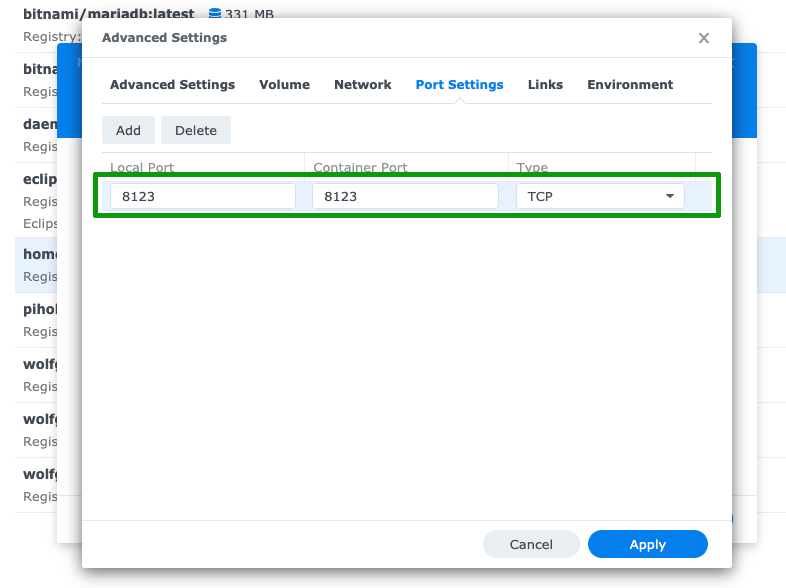
After mapping the folder, we also need to map a network port that you then will use to access the Web UI of your Home Assistant instance, once it is running.
Click on the Network configuration tab and enter a mapping of the container’s network port 8123 to any of your NAS free network ports. In my example I did map it also to 8123 for simplicity reasons.
The mapping of the network port finalises all the necessary configuration for your first start of your home automation container.
Of course there are unlimited, much more detailed configuration possibilities available, but the mapping of the config folder as well as the mapping of the network port represent the minimal viable configuration.
First Login to your Home Assistant Instance
Once you click on ‘Done’ within the Docker configuration wizard, your Synology Disk will try to start your newly configured Home Assistant container.
You can review its status within the ‘Container’ view that lists all the configured and running containers on your Synology Drive along with their resource consumption.

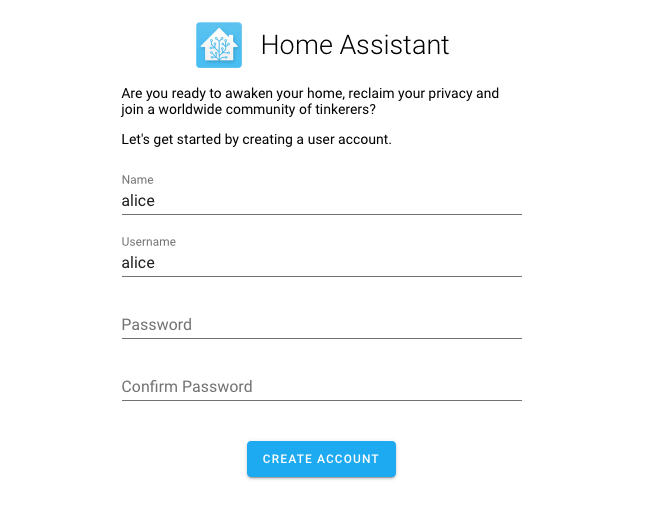
Access your Home Assistant system by opening a browser and navigating to your Synology’s network address and add your configured network port (e.g.: http://192.168.0.100:8123).
Home Assistant start screen will show up and ask you for creating your first user, as it is shown below.
During the startup of your Home Assistant system, the container creates a default configuration.yaml file within your mapped NAS folder. It contains some first configs that you can work with.
Configure a local MQTT Broker
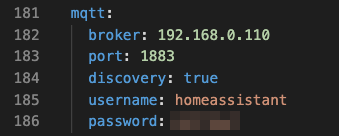
One of the most important parts at the beginning is to configure the address of your Mosquitto MQTT broker, as it is shown below.
The MQTT broker is a central component for communicating with all your systems sensors and actuators, so it is important to not forget about that:
Summary
Home Assistant represents the perfect Open Source home automation system for me as it perfectly combines a small footprint with the flexibility of running it as a fully dockerized container image.
The possibility to run my home automation system natively on a Synology NAS not only saves power but also comes with a lot of convenience.
Docker allowing me to run multiple different versions of Home Assistant in parallel, by not having to care about the dependency hell, is the only viable way for me to keep my Home assistant system up to date with newer versions without breaking my running automations.
All in all, Home Assistant — Docker and Synology is a great combination that you shouldn’t miss out on!
Thanks a lot for reading, I hope my article helped to spin up your own Home Assistant instance to automate your home.