This tutorial guides through the setup process for the TabShop Synchronization between two or more TabShop devices.
Preconditions:
- TabShop running on all devices you like to sync
- Devices run in your own WLAN network
Step 1: Open the TabShop Client/server sync settings
You can find the Client/Server sync settings menu in the TabShop settings view.
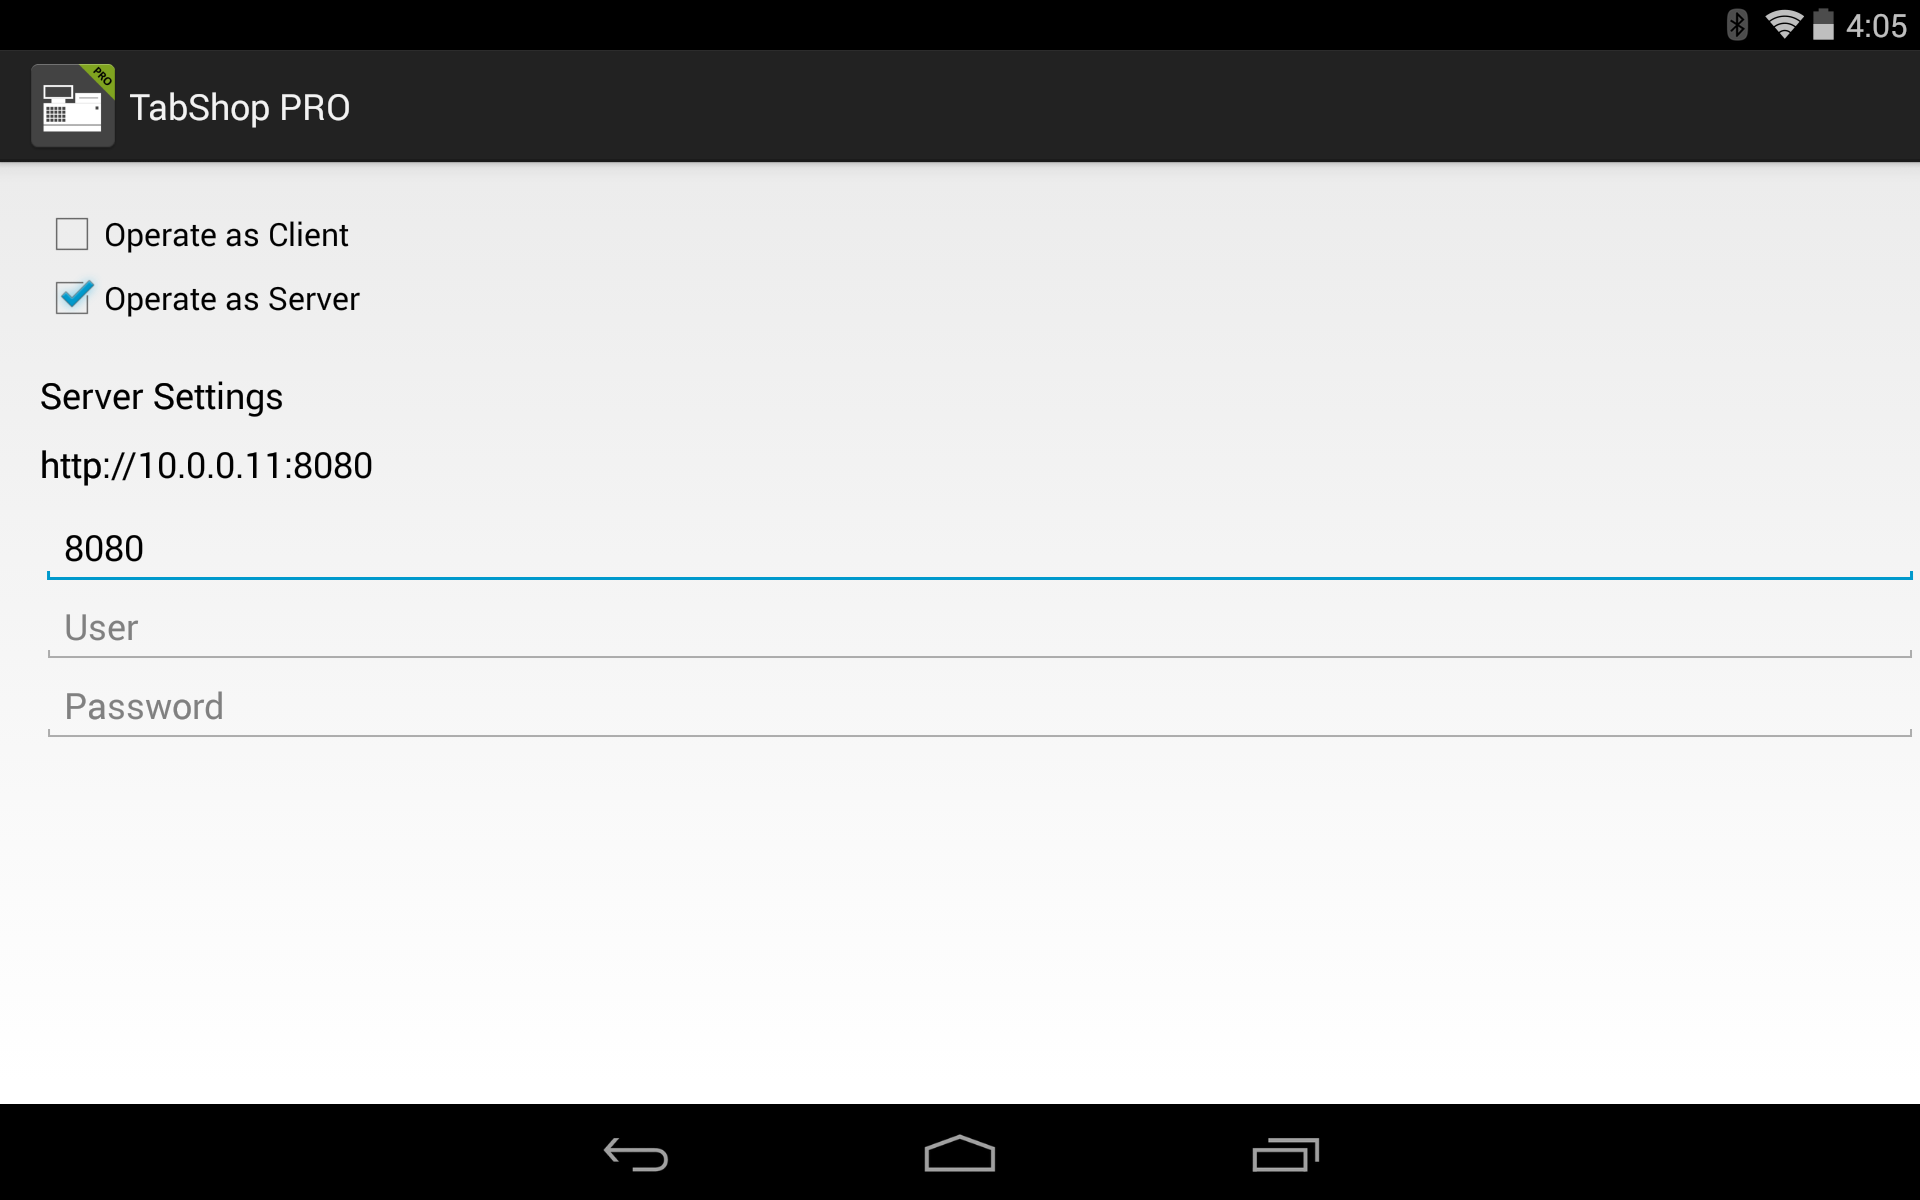
Step 2: Define a Server
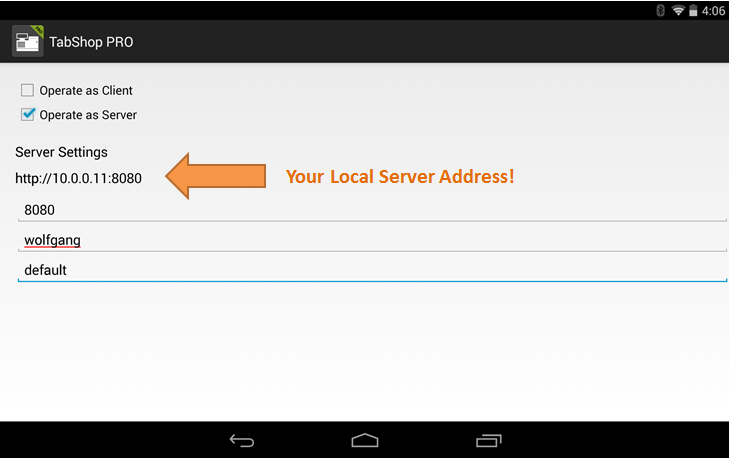
Within this step you have to select one of your devices to act as the server for all your other devices. Within the sync settings view click on the checkbox ‘Operate as Server’ to view and modify your server settings. You can define a specific network port for your server or you keep the default port 8080. You have to define a specific username and password that will be used by all your TabShop client devices to sync with your TabShop server device. In my example i chose the user ‘wolfgang’ and the password ‘default’ (which is not a very good password choice), see blow:
TabShop automatically identifies your local devices network address and shows you your local server address, see below:
Step 3: Tell a TabShop Client Device to Sync with your TabShop Server
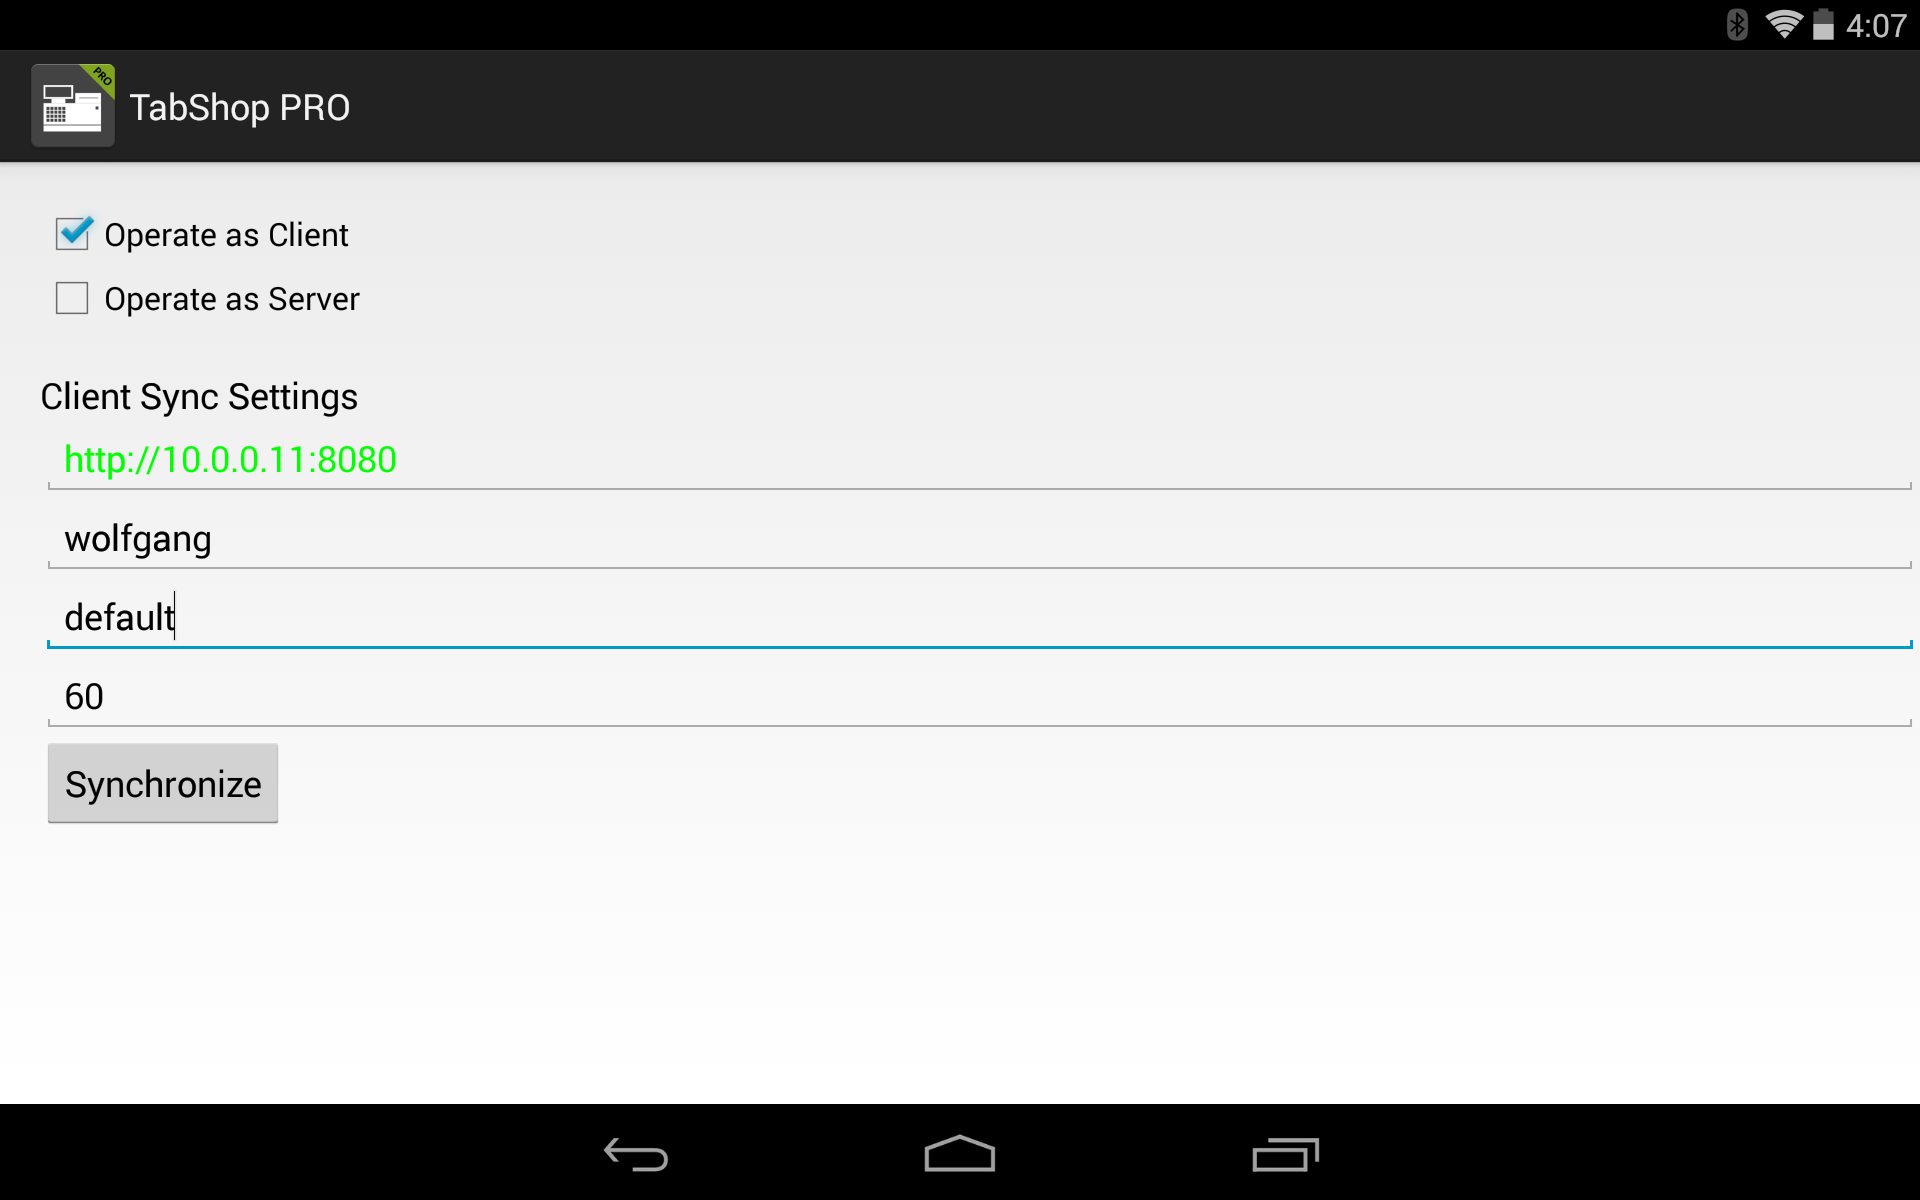
After you finished Step 2, you can now add TabShop client devices. Therefore you choose another Tablet running TabShop Pro and open the sync settings view again. This time you enable the checkbox ‘Operate as Client’ to edit the client settings. Insert your TabShop server address within the clients server address field, your chosen username and password and the synchronization interval in seconds. The server address automatically gets a green color if the client ia able to talk with your server devices. Otherwise you have to check your TabShop server address again.
Step 4: Finished
You are finished with the TabShop sync setting. The TabShop client now automatically receives the stock from the TabShop server and returns all finished invoices back to the server.