What if your 3D printer could do more than print toys, vases, or endless test cubes? What if it became your personal tool for repairing, improving, and customizing the world around you—saving money, reducing waste, and solving everyday problems in creative, elegant ways?
Within this post I will show how to print your own, personalized QR code name badges, such as your Linkedin profile or your web page. Such QR code or name badges are pretty easy to produce, even for entry level 3D printers and modern slicing software. QR code badges can provide value in many situations, but most importantly they support you in case you lost a precious thing like your travel case or bagpack.
Design your QR Code Badge
Free to use tools, such as TinkerCAD from Autodesk are great to start your 3D design journey. They offer all the right tools to start your QR Badge, such as 3D printing of text and generating a QR code based on text. See below how you can use TinkerCAD QR code generator to design your very own badge. You simply select the ‘Shape generators’ on the right side TinkerCAD design elements and then use the QR code element as shown below to enter your own text:
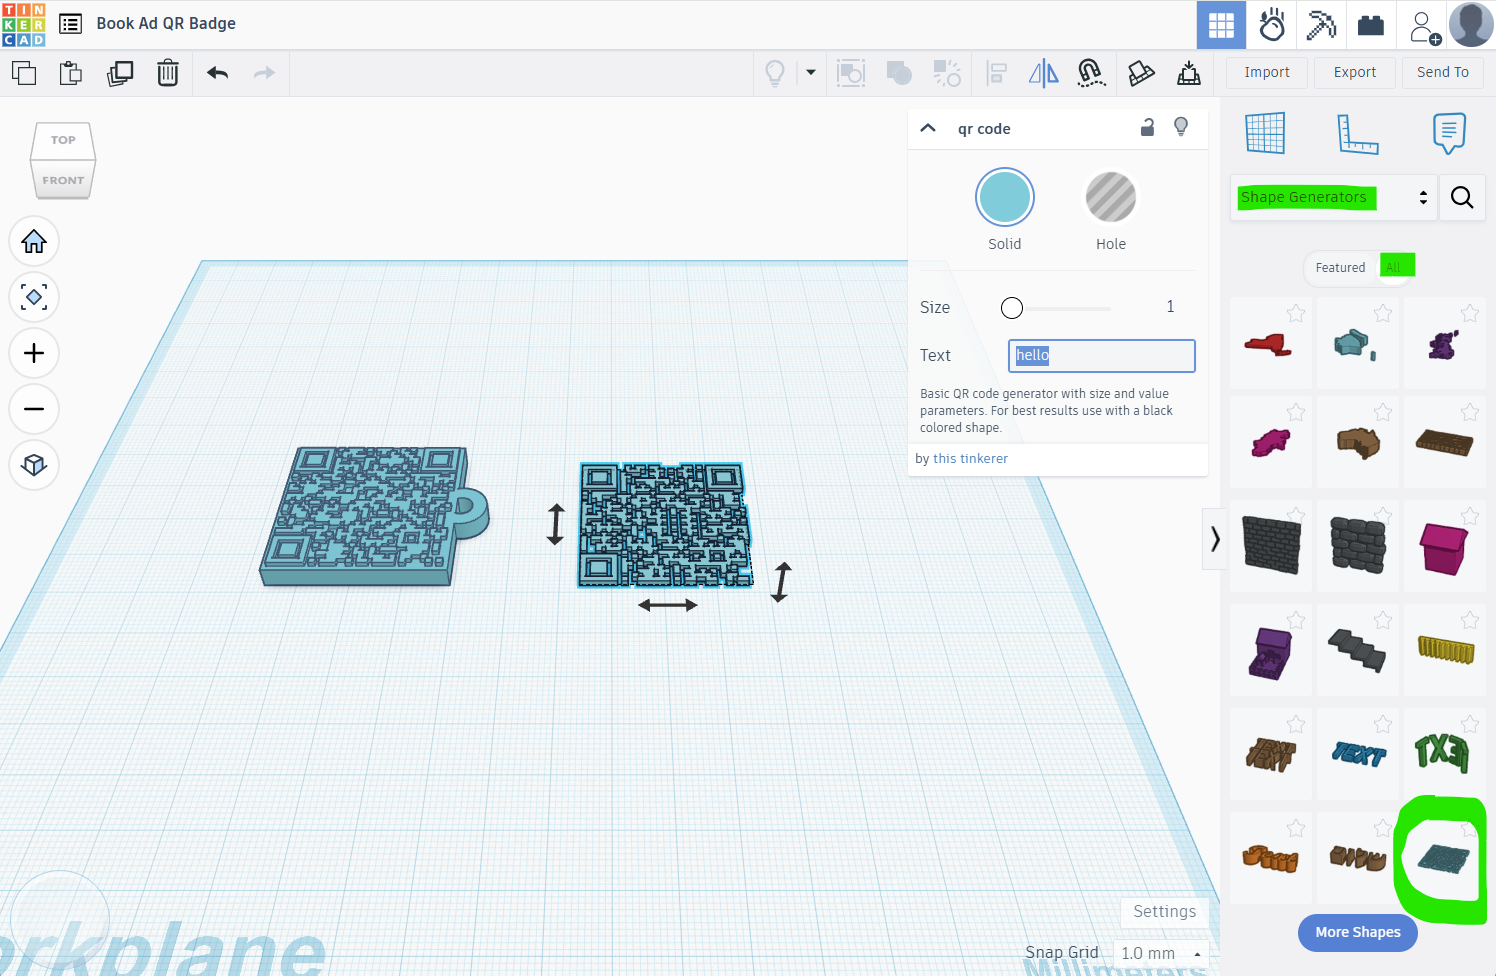
There are many more technical constraints when printing (or 3D-printing) QR codes for example the size of the QR-code modules (dots). Choose a size of your badge that allows you to use a QR-code module size of at least 1 or more, so that your printer is able to print the QR code in a way that can be scanned afterwards. Also take care of the “quiet-zone” (the blank border around the code) that is necessary for the scanner to identify the code in the middle of a larger printed badge. In our example above the code is the only element, which means that the white space and blank border constraint is easily fulfilled.
Slice your QR Code Badge
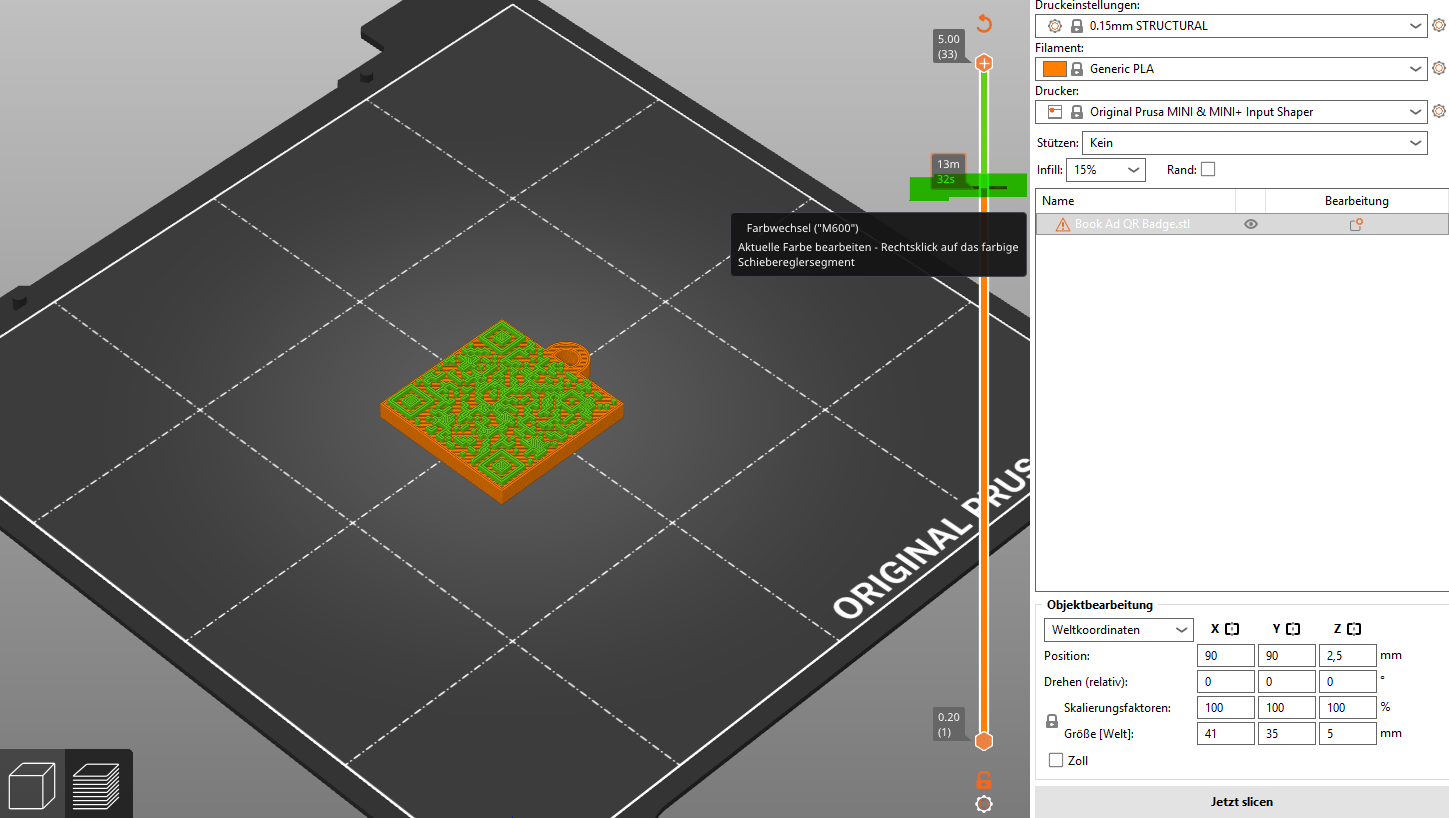
After you designed your desired badge shape, with or without name and address on it, you need to slice it in a way that the 3D Printer needs to pause at the right time to allow you to switch the filament color. As you need to print your badge in 2 colors, so that the name and the QR code stands out visually, that color chage step is necessary. But no worries, even low level 3D printers do allow you to do that.
Within your slicer software, you just move the slider on the right down until you see the first single QR code layer above the badges base structure. This is exactly the layer you need to define the printing pause to switch the color filament. If you define the pause too early, the color will not stand out. Always leave one single QR code layer in the base color (e.g.: black flilament) and then pause and switch to another color (yellow). Also make sure that the contrast between those 2 colors is high enough so that scanning of the QR code is possible afterwards.
Choose the right Filament
Especially for QR code printing the choice of filament is an importent one. Try to use non-glossy filaments of high quality to avoid reflections or distortions for the QR code scanner. Also the contrast of the two chosen filament colors play a major role. Colors of black on yellow or black on white work well.
Printing and Application
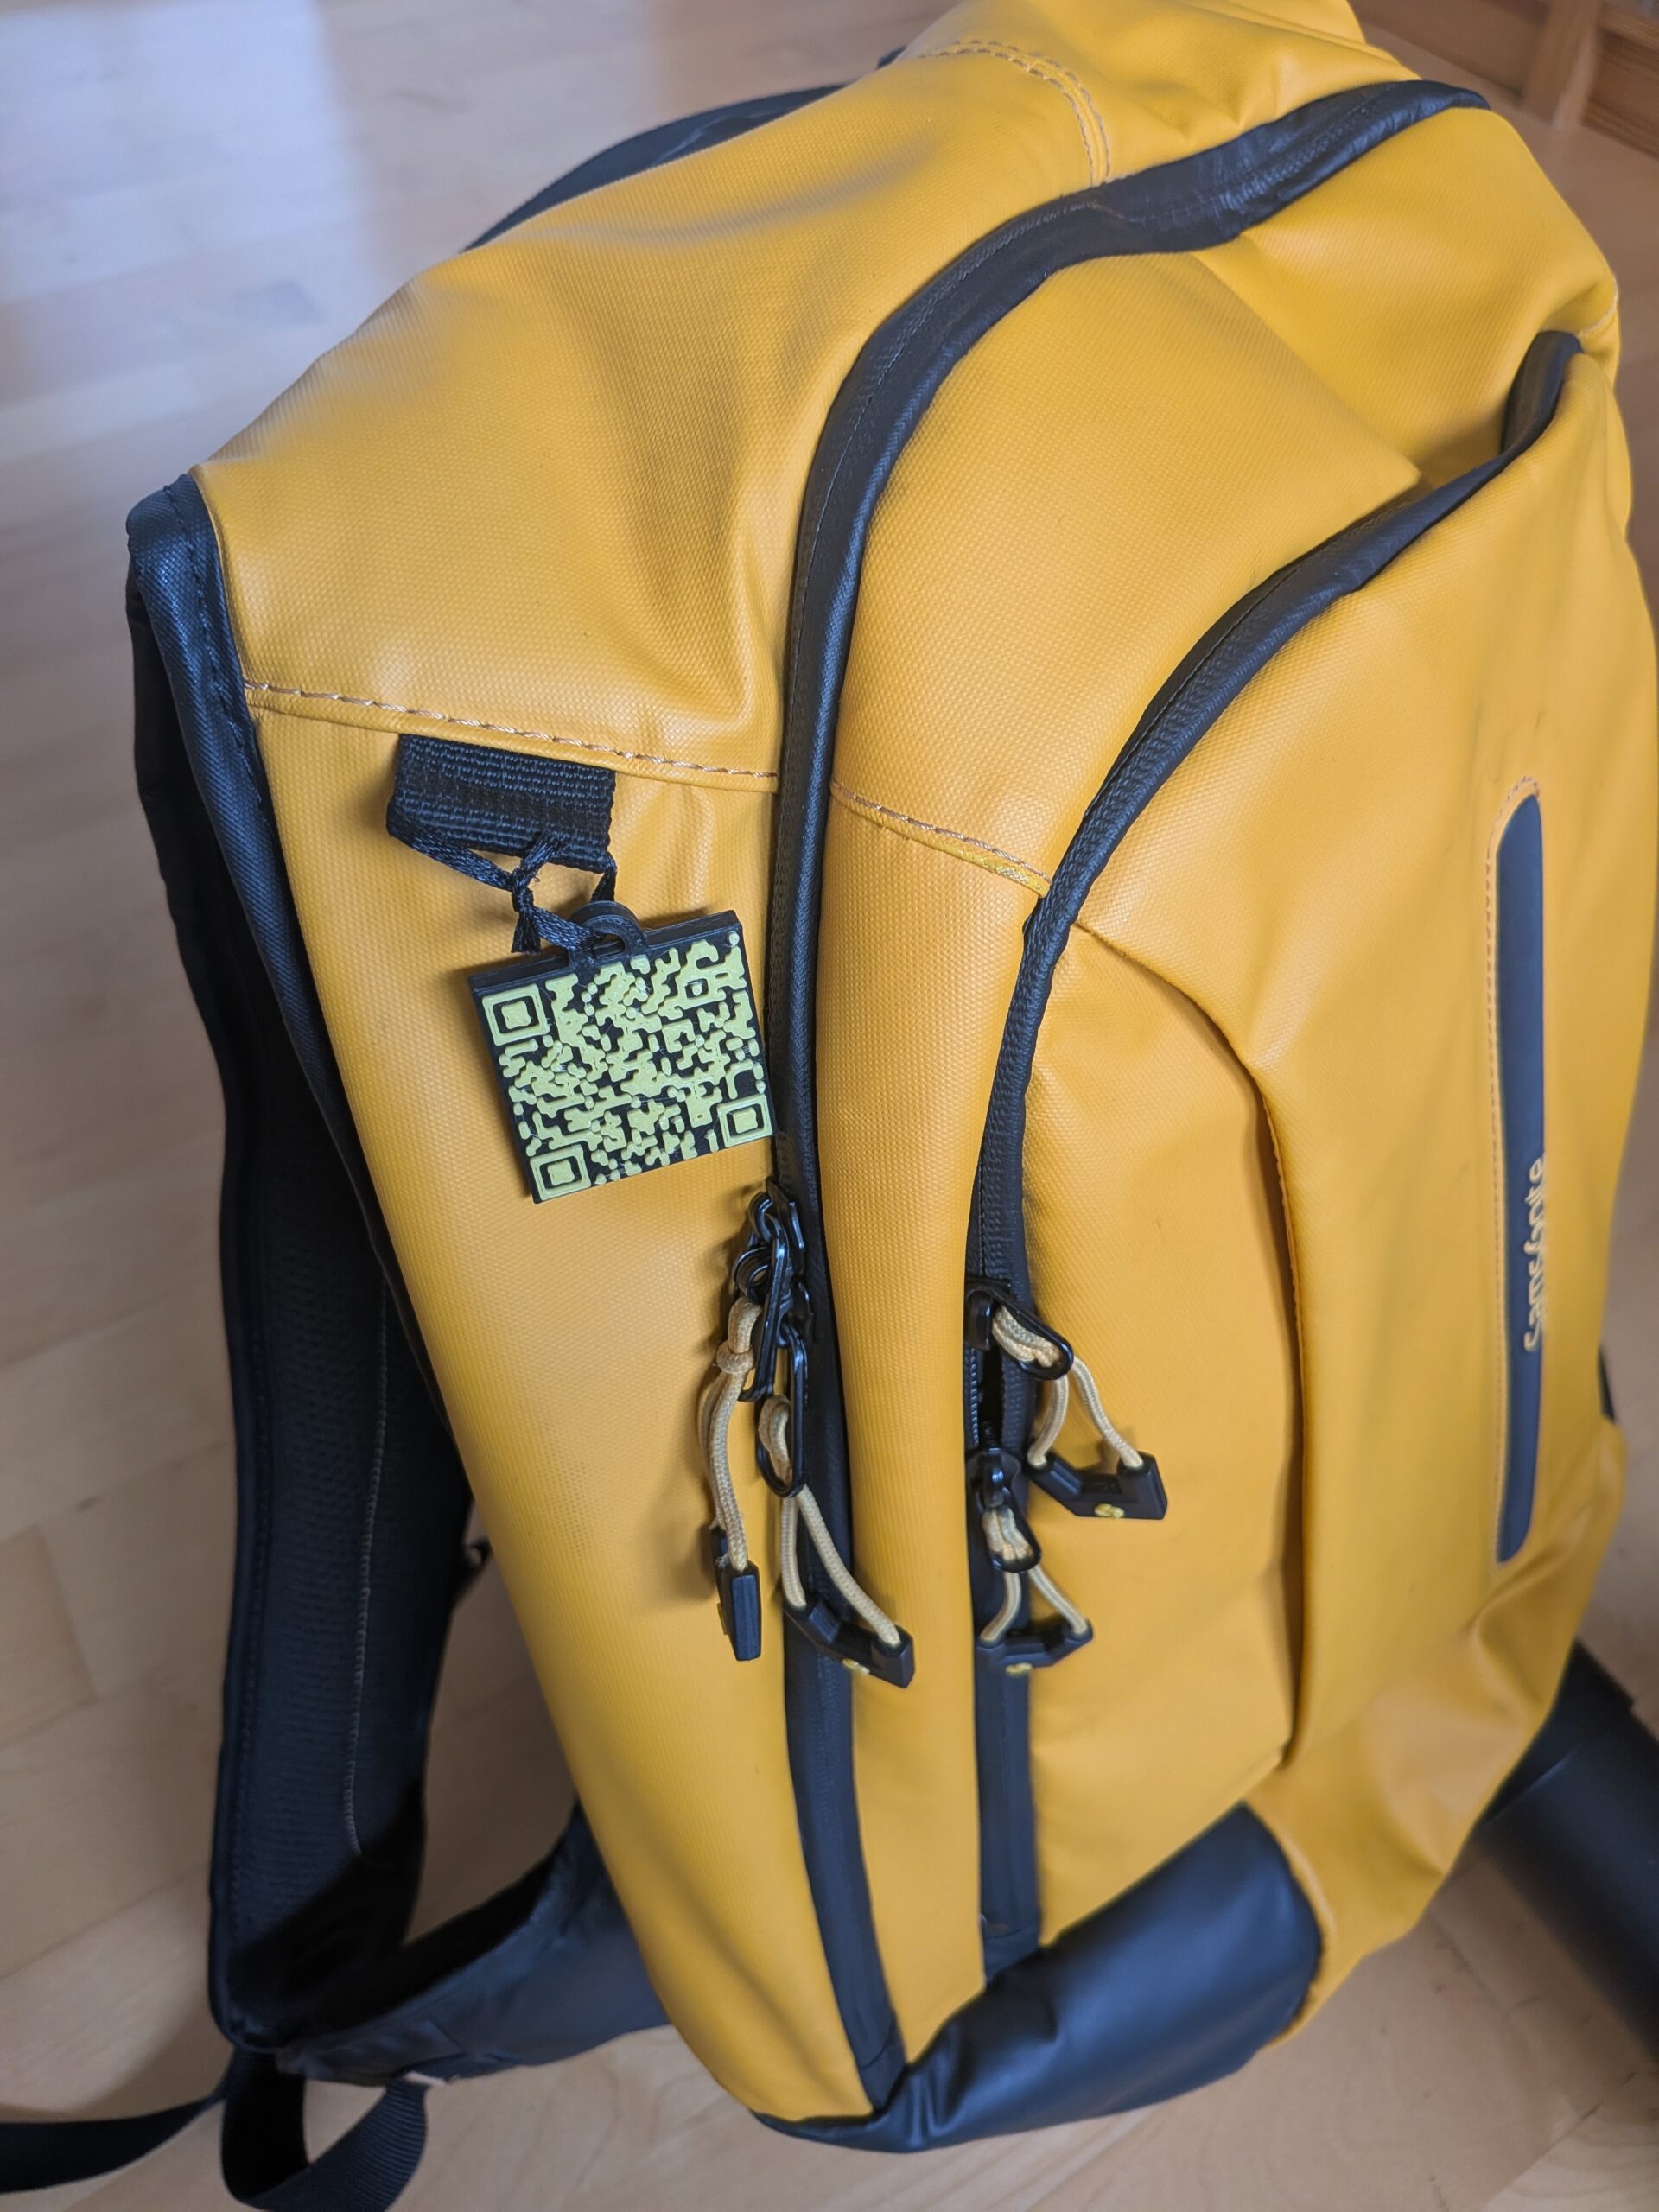
Once you print your QR code badge, your printer will stop at the defined layer and will let you unload the base filament and then switch to the QR code filament. This allows you to print a 2 color code badge that you can use all over to mark and tag your belongings, such as your bagpack or your travel suitecase. The QR code allows the honest finder to scan and find your contact in case they want to contact you that they found your belonging. See below my own Samsonite bagpack with my own designed Linkedin badge applied.
Final QR Code Scanning Test
After the successful print, we need to test the printed QR code to ensure that the design can be scanned by your phones QR code scanner.
In our case the chosen filament, along with the size of the badge and the dot sizes did work perfectly with any phone scanner.
Popular 3D Printers for your Badge
3D printing is dominated by highly accessible machines such as the Creality Ender 3, Ender 3 V2, and Ender 3 V3 SE, widely available through vendors like Amazon, Creality Store, and 3DJake. Many beginners also choose the Bambu Lab A1 Mini or Bambu Lab A1, known for fast, automated calibration and sold through the official Bambu Lab EU shop. For users seeking great value, the Anycubic Kobra Go, Anycubic Kobra 2, and Anycubic Photon Mono 4K resin printer remain popular options offered on Anycubic.com, eBay, and AliExpress, while the Elegoo Neptune 3, Elegoo Neptune 4, and Elegoo Mars 3 resin model attract hobbyists looking for high detail at a low price via Elegoo’s official store. Makers who want reliability with community support often turn to the Prusa MINI+, sold through Prusa Research, which consistently ranks as a top beginner printer worldwide. Budget shoppers also frequently consider the Voxelab Aquila, Artillery Genius, and Kingroon KP3S, all found on platforms like Banggood, Geekbuying, and Amazon Marketplace.
3D Printing Book
If you want to read about more of those useful 3D printing hacks, please check out my ebook online at Amazon: